Celotex PIR Insulation Boards
TB4000, GA4000, XR4000
Showing 1–99 of 128 results
Order PIR Insulation Boards in just three easy steps. First of all you need to select your brand. Once you have selected your brand, you will be presented with a choice of sizes. Select your size and then checkout to order your boards. We streamlined the process so you can order fast and securely.
TB4000, GA4000, XR4000

TW55, TP10, TF70, K118, K106

All Thicknesses
All Thicknesses
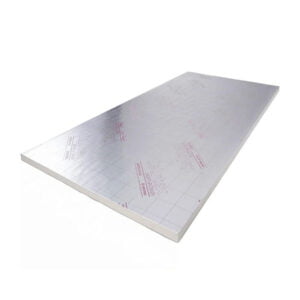
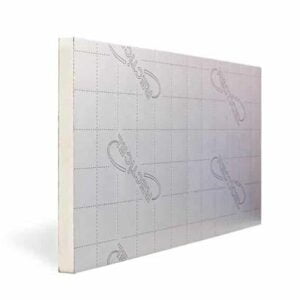
PIR boards are one of the most popular types of insulation materials due to their multi-purpose usage and easy application. PIR boards are rigid high-quality boards that are installed to create an insulation envelope around a property to improve the thermal conductivity. PIR boards are lightweight and easy to cut, handle, and install. PIR insulation boards are moisture resistant meaning if they are applied to a clean healthy environment they will prevent damp, mould, and rot from developing by preventing moisture build-up. Most provide thermal conductivity of 0.022W/mK and are 1200mm by 2400mm, available in a range of thicknesses from 20mm to 200mm. The boards are extremely durable and long lasting, they will not sag or become feeble over time.
Most PIR insulation boards are BBA Approved and have a Euroclass E Reaction to Fire classification. They are sustainable and achieve manufacture under Environmental Management System ISO 14001:2015.
PIR is a thermoset polymeric material that blends isocyanates and polyols. The manufacturing method creates a chemical reaction that produces a robust, rigid material that makes up the core of the material and does not melt when heated. This is also known as Polyisocyanurate.
The polyisocyanurate board is then bonded with a layer of low emissivity foil to create foil facings on each side to improve thermal quality by storing and increasing heat within the board.
The foil facing can also be used to reflect heat and keep it within a specific area, such as when PIR boards are installed into the ceiling the foil reflects the heat back into the building and begins to heat the property from the ceiling down.
PIR boards are extremely popular due to their versatility. They can be applied in a number of applications. Below are just a number of applications:
Dot and Dab method:
Mark the ceiling and floor, adding 10mm to the thickness of the board. Also, mark the wall's center. For horizontal alignment, mark centers every 1200mm to indicate board edges.
Cut boards to your desired size, leaving a 15mm gap from the wall's height.
Prepare plasterboard adhesive as instructed. Apply a continuous band of adhesive along the wall and ceiling edges, as well as around openings like windows and doors.
Apply adhesive to the wall in 50mm to 75mm wide and 250mm long dabs. Three vertical rows per board, one in the center and one on each side, with a minimum 25mm distance from the edges. Apply adhesive at skirting level too.
Use plasterboard packers to support the insulation boards. Press the board's reverse side against the adhesive dabs. Align it with the marks on the ceiling and floor, and secure it in place by tapping it with a straight edge.
Employ a board lifter to raise the board to the ceiling, ensuring a snug fit. Plasterboard packers can help hold the boards temporarily before removing the lifter. Repeat this process for the entire room, and then add plasterboards.
Other methods:
PIR insulation boards can be tightly fitted in between rafters and joists with no fixtures or adhesive needed. The boards should be secured with insulation netting materials or overlayed with plasterboard or insulation boards fixed to the rafters or joists.
There are various methods that can be applied when installing PIR insulation boards. The method depends on the location of insulation in the property and the purpose of the insulation. All insulation boards put together should be tightly butter together to avoid thermal bridging. Foil tape can also be applied where boards join and around the board’s edges. PIR Insulation boards should be cut using a hand saw and measured and marked if necessary.
A building professional should be consulted before any insulation boards are fitted into a property to avoid causing damage.
See a range of methods below.
Pitched roof between the rafters
The insulation boards should be measured and cut to fit vertically between the rafters. Insulation boards should then be fixed horizontally over the top of the rafters and fixed in place using a screw.
Flat roof external applications
Insulations boards should be measured and cut to size and can be externally applied over the top of the rafters internally between the rafters. The roof is then finished with weatherproofing materials and other fittings such as guttering.
Timber and steel-frames walls
Once the stud wall has been securely made, the insulation boards should be measured, cut, and placed into the wall’s studs tightly butted together. Plasterboard can then be fixed onto the timber frame and fixed using screws.
Partial fill masonry cavity walls
This can be applied to new builds or extensions. The insulations boards should be cut to size and fixed in between the outer and inner leaf of the building wall as the wall is being build. Build a layer of brickwork, fix the insulation boards using wall ties and the build-up the breeze blocks and continue.
Solid floor insulation –
Insulation is laid above the concrete slab along with a damp-proof membrane. This is followed by a polythene separating layer, and either a concrete screed or tongue and groove chipboard, the underlay and specified floor finish can then be applied.
FURTHER INFORMATION:
PIR Insulation boards should be kept in a dry space on a flat surface that is weatherproof. Although rigid, the boards should not be walked on as they may crumble or snap.
PIR Insulation boards are stocked by several well renowned and trusted brands within the building industry. These brands include Celotex, Recticel, Kingspan, Iko Enertherm and more.
The most popular PIR Insulation board is a 100mm thick board.
Get exclusive insulation board offers – straight to your mailbox!
The original home of PIR insulation boards. Nationwide delivery
Please note, we are an online company. Due to the volume of orders, if you have any questions please email orders@insulationboard.co.uk

We use SSL encryption and secure payment gateways for your online shopping experience. Shop with confidence when you choose Insulation Board